- my porsche0select your porscheYear
- All
- 2026
- 2025
- 2024
- 2023
- 2022
- 2021
- 2020
- 2019
- 2018
- 2017
- 2016
- 2015
- 2014
- 2013
- 2012
- 2011
- 2010
- 2009
- 2008
- 2007
- 2006
- 2005
- 2004
- 2003
- 2002
- 2001
- 2000
- 1993
- 1992
- 1991
- 1990
- 1989
Model- 911 R - 991
- 911 GT3 RS 4.0 - 997.2
- 911 GT3 RS - 991
- 911 GT3 RS - 997.2
- 911 GT3 RS - 997
- 911 GT3 - 991.2
- 911 GT3 - 991
- 911 GT3 - 997.2
- 911 GT3 - 997
- 911 GT3 - 996
- 911 GT3 RS - 991.2
- 911 GT3 - 992
- 911 GT3 - 992.2
- 911 GT3 RS - 992
- 911 GT2 RS - 997.2
- 911 GT2 - 997
- 911 GT2 - 996
- 911 Turbo / S - 991.2
- 911 Turbo / S - 991
- 911 Turbo / S - 997.2
- 911 Turbo - 997
- 911 Turbo - 996
- 911 GT2 RS - 991.2
- 911 Turbo / S - 992
- 911 Carrera GTS - 991.2
- 911 Carrera S - 991.2
- 911 Carrera - 991.2
- 911 Carrera GTS - 991
- 911 Carrera S - 991
- 911 Carrera - 991
- 911 Carrera GTS - 997.2
- 911 Carrera - 997.2
- 911 Carrera - 997
- 911 Carrera GTS - 992
- 911 Carrera - 996
- 911 Carrera / S / 4S - 997.2
- 911 Carrera / S - 992
- 911 Carrera 4/4S - 992
- 911 Carrera / S / T - 992.2
- 911 Carrera 4/4S - 992.2
- 911 Carrera GTS Hybrid - 992.2
- Boxster - 986
- Cayman / Boxster - 718
- Cayman GT4 - 981
- Cayman / Boxster - 981
- Boxster Spyder - 981
- Cayman / Boxster - 987.2
- Cayman / Boxster - 987
- Boxster - 987
- Cayman GT4 / Boxster Spyder / GT4RS - 718
- Cayenne - 958
- Cayenne - 957
- Cayenne - 955
- Panamera - 970
- Panamera - 971
- Macan - 95B
- Macan - 95B.2
- Macan - 95B.3
- Cayenne - 9Y0E3
- 911 (964) - 964
- Car Not Listed?
Gomy porsche0Save my car - ProductsOpen
- ProjectsOpen
- ResourcesOpen
- MediaOpen
- InfoOpen
Your Cart
Your cart is empty
X
Shark Werks ECU Removal & Installation Guide for Porsche Cabriolet 996 / 997, Turbo, Carrera / S
instructions FOR models:
- 911 Turbo / S - 997.2
- 911 Turbo - 997
- 911 Turbo - 996
- More
- 911 Carrera GTS - 997.2
- 911 Carrera - 997.2
- 911 Carrera - 997
- 911 Carrera / S / 4S - 997.2
- 911 Carrera - 996
For convertible models, the ECU removal is a different process than that of the coupe models. If your car is a hardtop, please read this guide instead to remove the ECU.
PLEASE NOTE: As of Dec 2018 and beyond, Shark Werks no longer sells ECU tuning services for ECUs sent to our facility. For tuning we exclusively tune via the OBD2 port using EVOMSit and the DimSport MyGenius device. For more info on this product, please read the relevant product page for tuning your vehicle on our site. Please do not send your ECU to our shop at this time. For all OBDII software / tuning upgrades done via the OBDII port and options please select your car from here
If you need to re-flash or change the software on your 996 or 997, it may be necessary to remove the ECU from the car yourself. Please note, these instructions are only for the 1999-2012 model year Porsche 911 and sub-models.
Porsche does leave something on the table with most of its models, and there can be significant power and acceleration gains with minor remapping of the ECU software. SharkWerks exclusively uses EVOMSit software for its research and development history and record-breaking performance achievements in the Texas Mile and quarter mile drag racing.
For details on performance gains and other benefits please see 997 Turbo, 997 GT2, 997 GT3, 996 Turbo, and other cars.
On convertible models, the ECU is attached to a bracket located under the convertible top in the rear of the car (in front of the engine decklid). The removal process takes about 15 minutes or less.
Tools Required
1) Short phillips screwdriver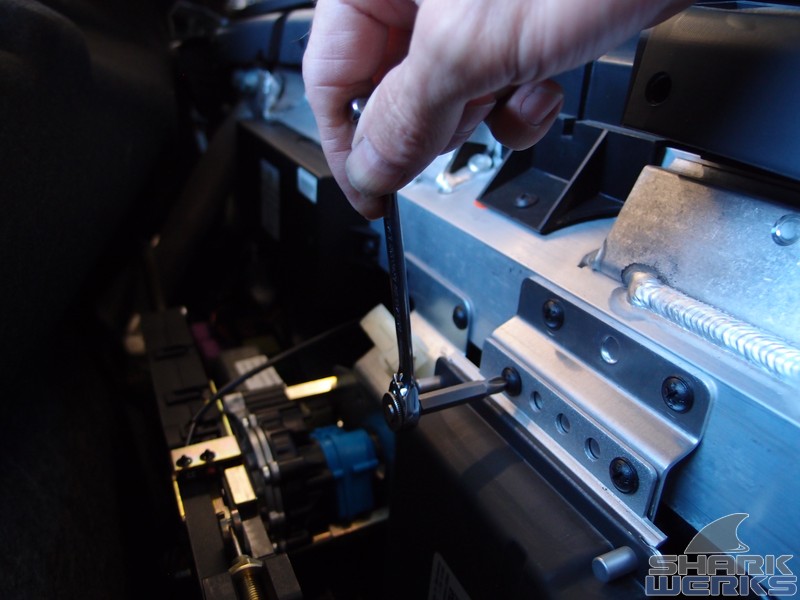
We recommend a "right angle bit driver" with removable screwdriver bits, like the type shown here, as it's very small and easy to work with. They can be purchased from a hardware store such as Lowe's or Home Depot for a few dollars.
2) Car Trim Removal Tool
A tool similar to this shape, used to remove plastic interior fasteners: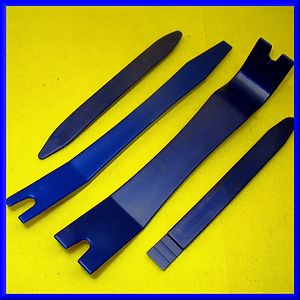
Step 1: Partially Lower the Convertible Top
To begin, you must partially lower the convertible top. Press the top-down button and wait until there is a small gap. Do not lower the top completely.
Here is an example of how much to open the roof: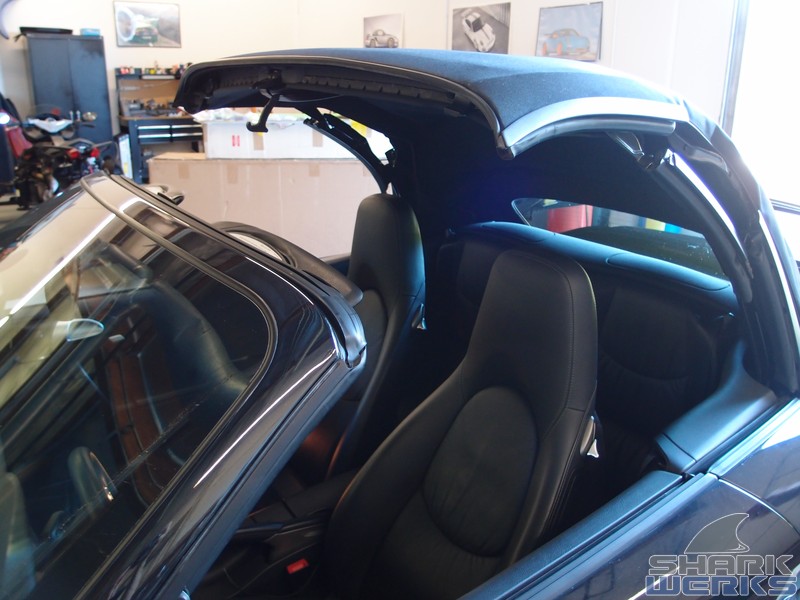
Step 2: Opening the Backside of the Convertible Top
The convertible fabric attaches to the car behind the glass roof, on both sides. If you follow the edge of the rear side of the roof with your hands, you will locate one cable on each side.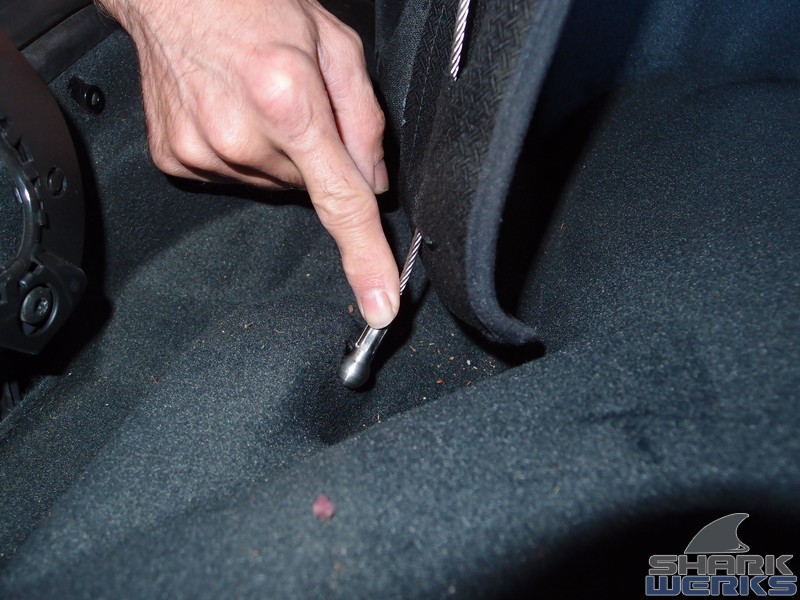
The ends of the cables have ball joints. With a little force, push inward (toward the center of the car) to pop the ball off the cable end: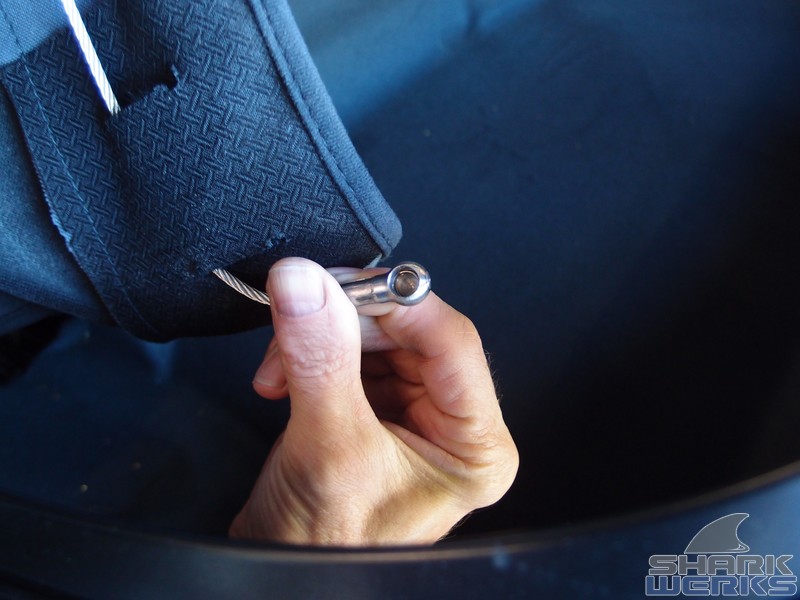
With both cables detached, the glass window and rear piece can be flipped upward.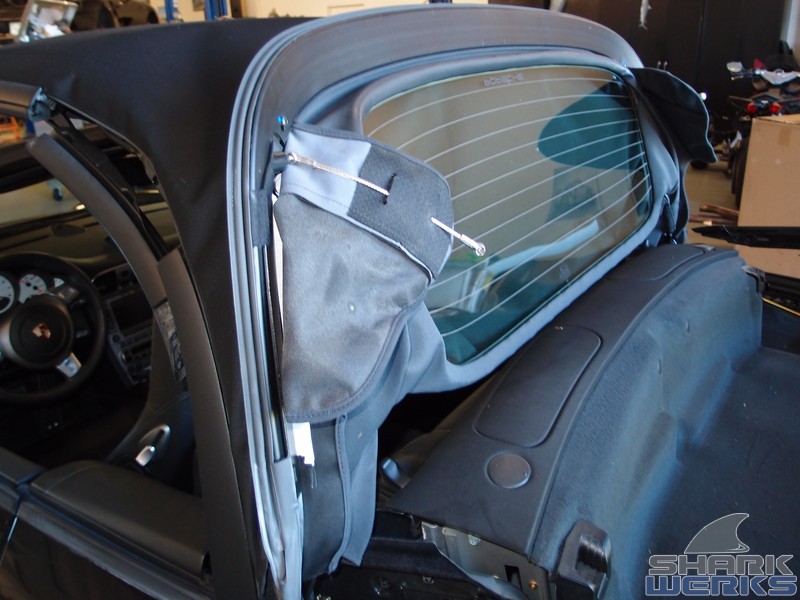
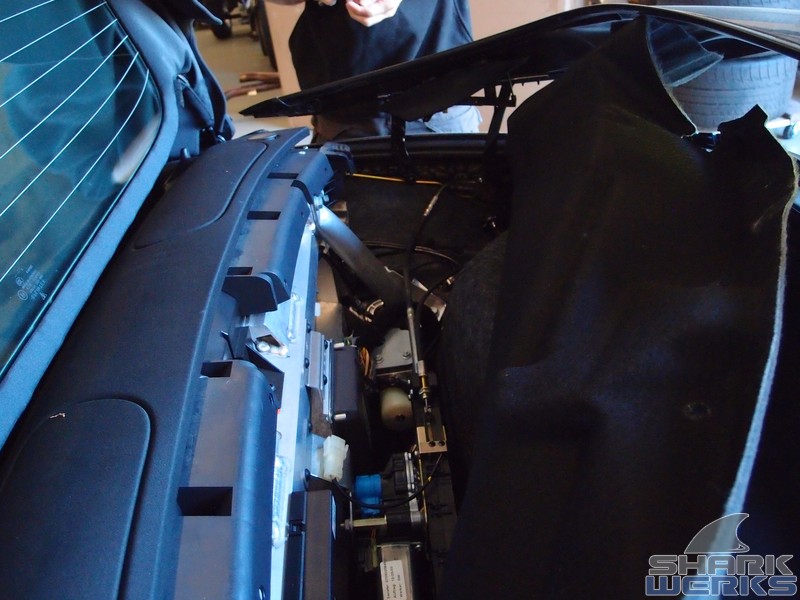
Step 3: Accessing the ECU
Under the glass and rear of the top, a rear-facing, molded cover is attached to the car. On the vertical, rear-facing side, find the two plastic fasteners (you can also see these in the picture above). These are two plastic ~1.5-inch diameter circles, at the center of the grey carpet-looking cover that is mounted vertically. These are removed using a Car Interior removal tool.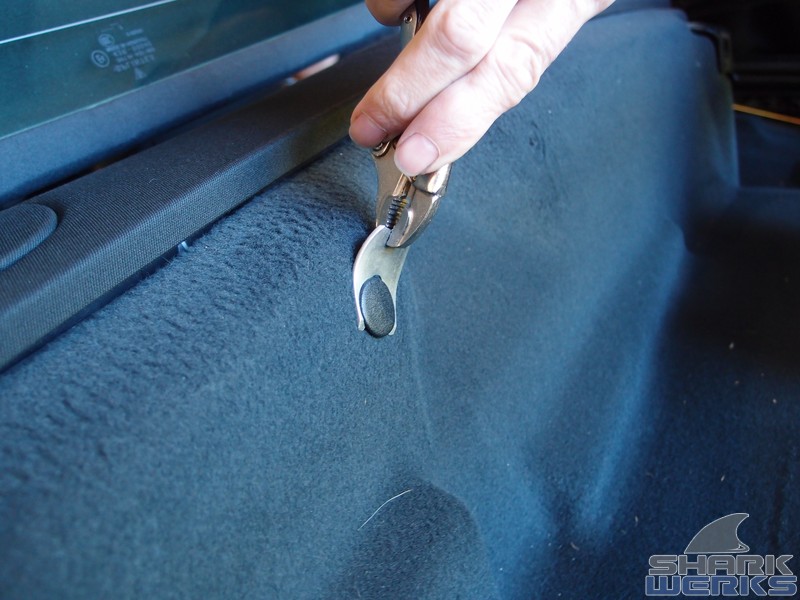
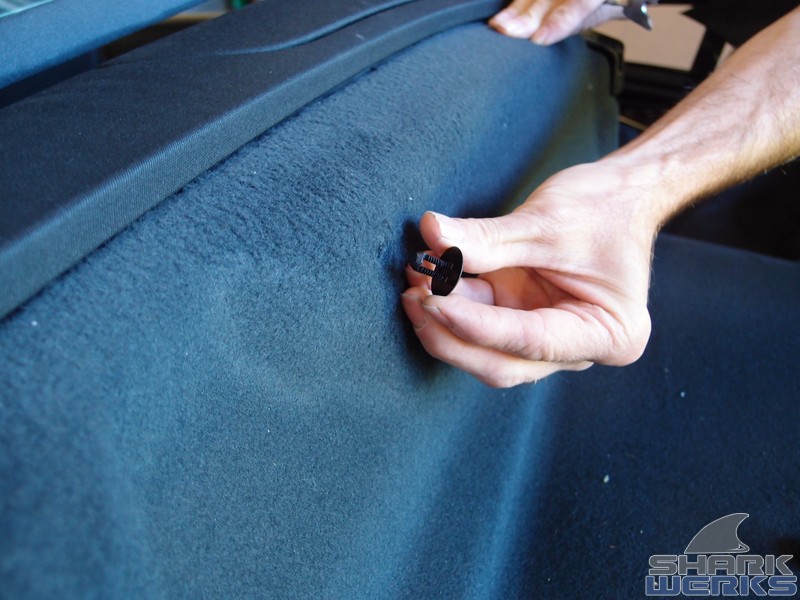
They are removed by prying with the tool, toward the back of the car. With a little wiggling at the passenger side, you can move this cover out of the way partially toward the rear of the car. The ECU tray is located in the center.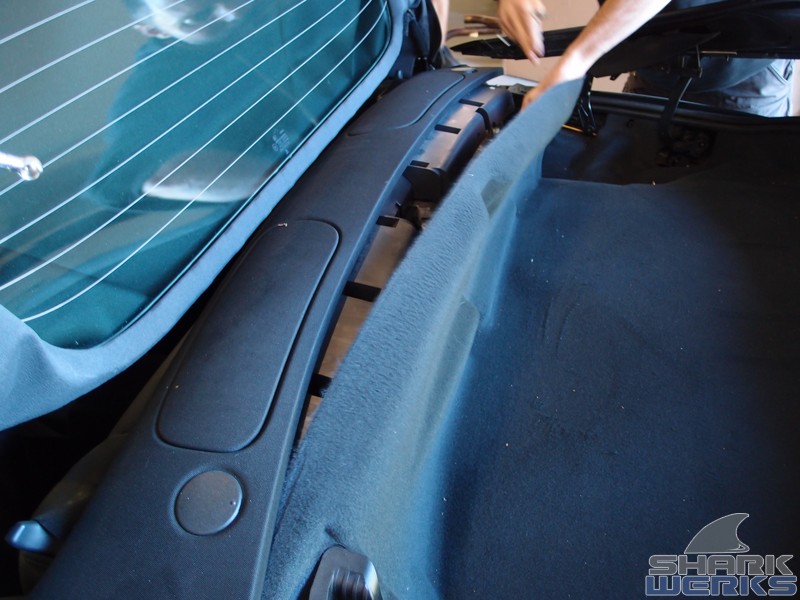
Step 4: Removing the ECU and Cables
Four phillips screws hold the ECU in place. Remove the lower two screws, closer to the ECU. Do not remove the upper two screws.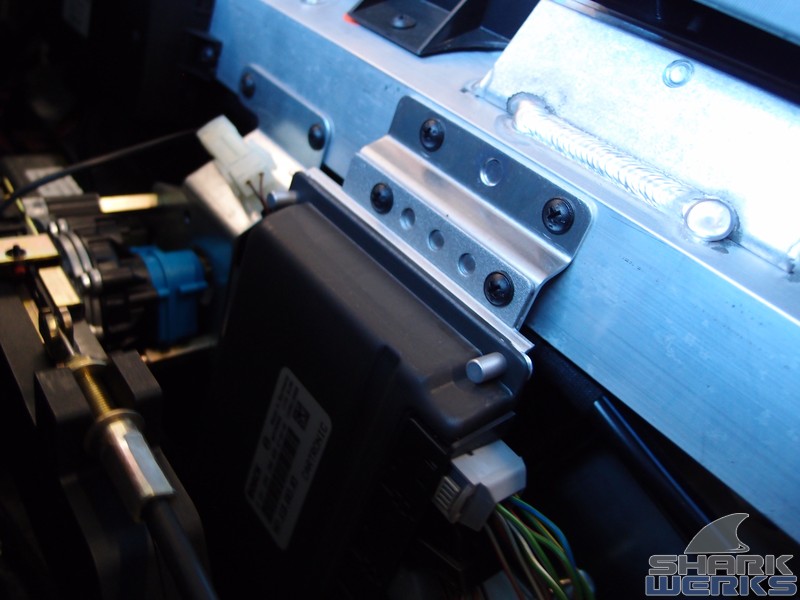
There are also two screws on the other side of the ECU, which may be difficult to see. The bracket looks the same on both sides, remove the same two screws on the other side of the ECU.
At this point you simply need to disconnect the ECU (which is the same process as the hardtop model):
Remove the cables in order, from left to right (first 1, 2, 3, 4, then 5). The far left and far right cables are removed by squeezing tabs at the top: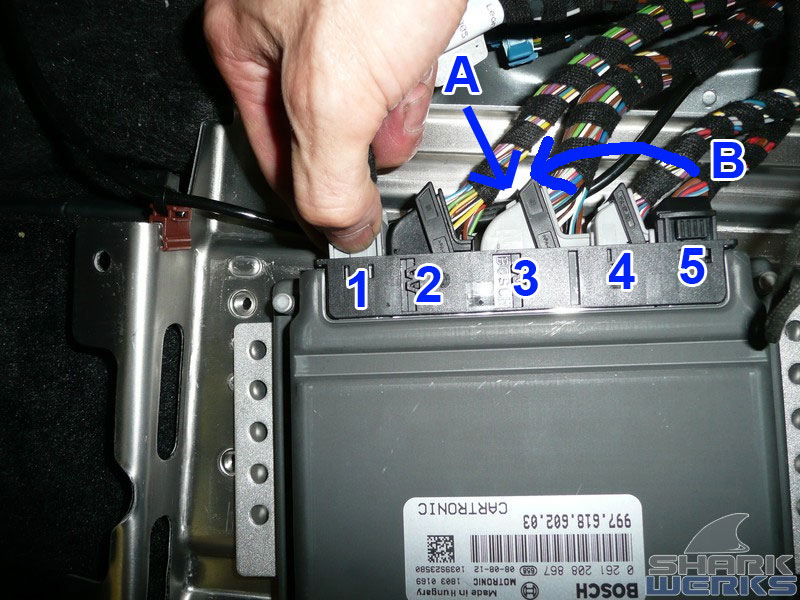
The inner connections are removed by first pressing the button (A) and rotating the keeper to the left (B). No extra force should be required: The connections will pop-out on their own as you release this keeper system.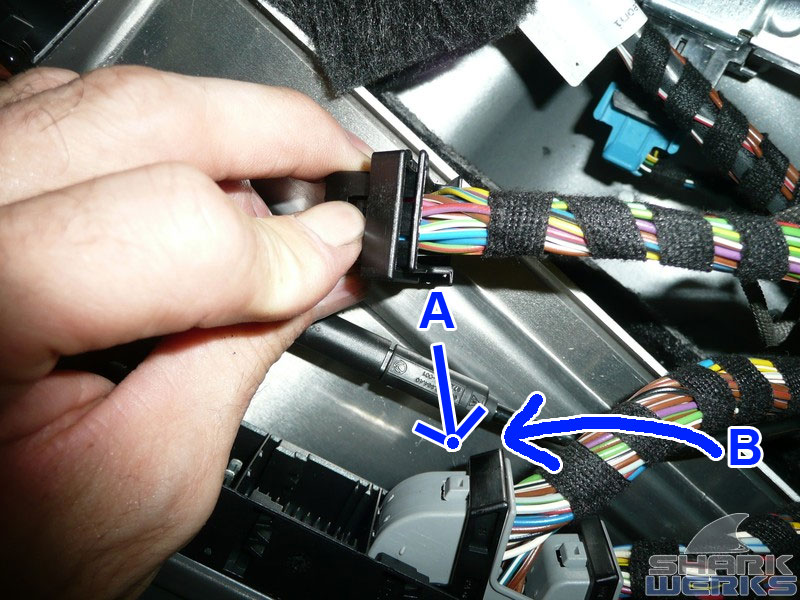
The ECU has been removed from the car, and is now ready to send to SharkWerks for the EVOMSit Software Upgrade! We recommend UPS Next Day Air service for a 2-day round trip :)
Reinstalling the ECU
Re-install the ECU's connectors in the opposite order of removed (first 5, 4, 3, 2, then 1). The inner connectors will lock in automatically as the keeper is rotated. Make sure they are rotated fully to the left (as they were removed) before you attempt to re-install.
For quotes on pricing for your specific car feel free to contact us via 510-651-0300 or Email us to .